It’s late, you’re on the road, and you glance in your mirror – uh oh. Are those marker lights out? As a fellow driver myself, I know that sinking feeling in your gut. Suddenly, a simple run turns into a potential headache. Dealing with Volvo VNL marker lights not working isn’t just an annoyance; it’s a real safety concern and can even get you flagged by DOT. Trust me, I’ve been there, scratching my head in a dimly lit truck stop wondering, “Why are my Volvo VNL marker lights dead?”
Marker lights, also sometimes called clearance lights or running lights, are those essential little beacons on your cab, sides, and sometimes rear of your VNL. They aren’t just for show. They shout out to everyone on the road, especially in low light or bad weather, “Hey, I’m a big rig, and I’m here!” They’re absolutely vital for making sure you’re seen, keeping you safe, and keeping you legal. Ignoring a Volvo VNL marker lights issue is simply not an option.

That’s why I’ve put together this guide for you. Think of it as your roadside buddy for when your Volvo VNL marker lights are not lighting up. I’m going to walk you through, step-by-step, how to figure out why your Volvo VNL cab marker lights not working, or maybe your Volvo VNL side marker lights not working, and how to get them fixed. We’ll troubleshoot everything from the quick and easy checks to digging a little deeper into the electrical system. Let’s get started and get those lights burning bright and get you back on the road safely!
Okay, let’s dive into understanding these marker lights a bit better. Knowing what you’re dealing with is half the battle when you’re tackling a problem like Volvo VNL marker lights issue.
Understanding Volvo VNL Marker Lights: Types, Location, and System Basics
Okay, let’s dive into understanding these marker lights a bit better. Knowing what you’re dealing with is half the battle when you’re tackling a problem like Volvo VNL marker lights issue.
Types of Marker Lights on a Volvo VNL:
Just like different rigs have different setups, Volvo VNLs use a few types of marker lights. You’re not just looking at one kind of bulb scattered around. Knowing the types helps you pinpoint which ones might be giving you trouble and where to look for them.
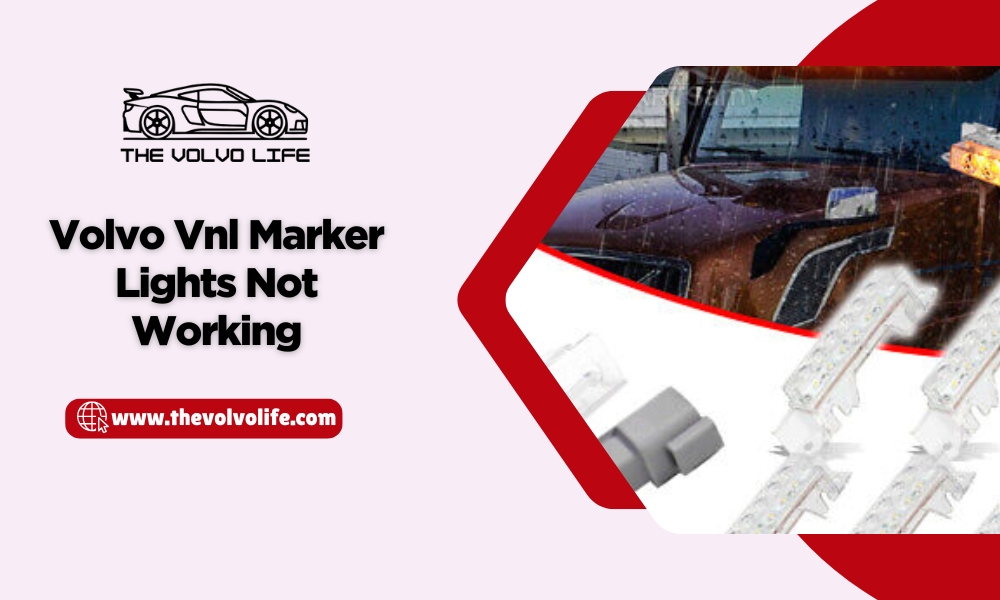
- Cab Marker Lights: These are the fellas usually lined up across the top of your cab. Sometimes called ‘roof lights’ or ‘identification lights’, they are a set of (usually) five lights that clearly mark the width and height of your cab. They make sure other drivers know just how big you are, especially from the front and rear. If your Volvo VNL cab marker lights not working, it’s pretty noticeable, and definitely something you want to address ASAP.
- Side Marker Lights: As you might guess, these are along the sides of your truck and trailer. They’re spaced out to show the length of your rig when viewed from the side at night. Think of them as your truck’s illuminated profile. If you’ve got Volvo VNL side marker lights not working, you might notice sections of your truck’s side profile disappearing in the dark.
- Rear Marker Lights (If Applicable for VNL): Depending on the exact VNL model and configuration, you might have marker lights on the rear as well. These are crucial for making sure your trailer’s end is clearly visible from behind, particularly for following traffic.
Each of these marker lights plays a critical role in making sure your Volvo VNL is seen by everyone around you, day or night, rain or shine. They’re not just about looking good; they are about being safe and compliant with regulations.
Basic Electrical Circuit Overview for Marker Lights:
Now, let’s talk a little about how these lights actually get their power. Don’t worry, we won’t get bogged down in super technical stuff, just the basics to help you understand Volvo VNL marker lights electrical problem a bit better.
Think of it like a simple loop. To get your marker lights to shine, electricity needs to flow in a complete circle:
- Power Source (Battery): It all starts with your truck’s batteries, providing the juice to power everything, including your marker lights.
- Fuse: Think of the fuse as a tiny circuit breaker. It’s there to protect the wiring. If there’s too much electricity flowing (like in a short circuit), the fuse blows, stopping the power and preventing damage. If you have Volvo VNL marker lights dead, checking the fuse is always one of the first and easiest steps.
- Relay (Potentially): Some circuits, especially for lights, use a relay. A relay is like an electrical switch that uses a small current to control a larger current. For marker lights, a relay might be used to handle the power load. It’s another component that can sometimes fail and cause your Volvo VNL marker lights running lights malfunction.
- Wiring: Wires are the highways for electricity. They connect all the components together. Problems in the wiring, like breaks, shorts, or corrosion, are common reasons for Volvo VNL marker lights wiring problem.
- Bulbs: These are what actually produce the light. Over time, bulbs burn out, just like in your house. Simple Volvo VNL marker lights bulb replacement can often solve the problem.
- Ground: The ground is just as important as the power supply. Electricity needs to return to the battery to complete the circuit. If you have a Volvo VNL marker lights ground issue, the lights won’t work, or might be Volvo VNL marker lights dim.
- Lighting Switch/Stalk: You control when the marker lights come on with your lighting switch or stalk on the steering column. This switch closes the circuit, allowing power to flow to the lights when you turn them on.
Understanding this basic flow is key to troubleshooting. If your Volvo VNL clearance lights not working, it means something is breaking this circuit loop at some point. Let’s get into finding out where!
Diagnosing “Volvo Vnl Marker Lights Not Working”: Step-by-Step Troubleshooting
Fuses are your electrical system’s first line of defense. When something goes wrong in a circuit, like a short, a fuse is designed to blow out and stop the flow of electricity before it can damage more expensive parts or even start a fire. So, if you have Volvo VNL marker lights dead, a blown fuse is high on the list of suspects. Here’s how to inspect those fuses:
Locate the Fuse Box(es): Volvo VNLs, like most modern trucks, usually have more than one fuse box. The ones you’re interested in for your marker lights could be in a few places:
Identify a Blown Fuse: Once you’ve found your fuse box, you need to find the fuse for your marker lights. Again, your owner’s manual fuse layout is gold here. Look for labels or symbols that indicate “marker lights,” “running lights,” “clearance lights,” or sometimes just “park lights.” (They can be labeled differently). Once you’ve located the potential fuse, here’s how to check if it’s blown:
Visual Inspection: Most fuses are see-through. Look at the thin wire or strip inside the fuse.
Good Fuse: The wire will be intact, not broken or melted.
Blown Fuse: The wire will be broken, melted, or you might even see blackening inside the fuse.
Fuse Tester (Optional but Handy): For a surefire check, you can use a fuse tester. These are cheap little tools you can get at any auto parts store. You just touch the tester to the metal test points on top of the fuse without removing the fuse (some testers allow this, check instructions). If the tester lights up, the fuse is good. If not… likely blown.
If you find a blown fuse, don’t just replace it and forget about it just yet! Fuses blow for a reason – usually because of an electrical overload. While sometimes it’s just an old fuse giving up, it could also be a sign of a bigger problem down the line, like a short circuit. However, for now, replace the blown fuse with a fuse of the exact same amperage (the number printed on the fuse). Turn on your lights. Did they come back on? If yes, great! Keep an eye on it. If the fuse blows again quickly, then we know we’ve likely got a more serious Volvo VNL marker lights circuit problem we’ll need to investigate further. If replacing the fuse didn’t do the trick, let’s move to the next quick check.
Check for Loose Connections and Corrosion:
Out on the road, your truck takes a beating. Vibration, weather, road salt, you name it – it all takes its toll on wiring and connectors. Loose connections or corrosion can easily cause your Volvo VNL running lights malfunction by interrupting the electrical flow.
Here’s what to check:
- Marker Light Connections Themselves: Go right to your marker lights. Gently wiggle the wiring connections at the back of the light fixtures. Are any loose? Do they feel secure? Sometimes, a connection just vibrates loose over time.
- Fuse Box and Relay Area Connections (If Accessible): While you’re checking fuses, take a peek at the wiring around the fuse box and any relays you can easily see related to the lighting system. Again, gently check for loose wires or connectors.
- Look for Corrosion: Corrosion is your electrical system’s enemy. It’s that white or greenish powdery stuff you sometimes see on metal parts, especially around electrical connections. It blocks the flow of electricity. Look for corrosion:
- At the bulb sockets themselves.
- On wiring connectors.
- Around ground points (where wires attach to the truck frame).
If you find loose connections, push them back together firmly. If you see corrosion, you can try cleaning it off gently with a wire brush and some electrical contact cleaner (you can get this at any auto parts store). Make sure everything is dry before reconnecting. After checking connections, try your marker lights again. Still no luck? Alright, now it’s time to grab a test light or multimeter and get a little more technical.
Deeper Dive: Electrical System Testing
Okay, so we’ve checked the easy stuff, and your Volvo VNL marker lights are still not working. Time to move to a bit more in-depth electrical testing. Don’t worry, it’s not rocket science, and with a simple test light or multimeter, we can start to pinpoint where the electrical break is.
Testing for Power (Voltage) at the Marker Light Socket:
The first step in deeper electrical diagnosis is to see if power is even getting to the marker light socket itself. For this, you’ll need either a simple test light (looks like an ice pick with a wire and a light bulb in it) or a multimeter (a bit more versatile, but slightly more complex if you’re new to electrical testing). Both tools will tell us if electricity is reaching the bulb socket when it’s supposed to be.
- Using a Test Light:
- Ground the Test Light: Connect the clip end of your test light to a good ground point on your truck’s frame or chassis. Bare metal is best for a good ground.
- Probe the Bulb Socket: Turn your truck’s marker lights ON using the light switch. Carefully touch the probe tip of the test light to the center contact inside the bulb socket. This is where the power should be coming in.
- Check for Light:
- Test Light Lights Up: This is good news! It means power is getting to the socket. The problem is likely at the socket itself, or with the ground for that specific light. We’ll get to ground checks soon.
- Test Light Stays Dark: This tells us power is not reaching the socket. The problem is upstream – somewhere before the socket in the electrical circuit (like a fuse, wiring, relay, or even the switch).
- Using a Multimeter (Voltage Test):
- Set Your Multimeter to DC Voltage: Turn your multimeter dial to the DC Voltage setting (usually marked “V” with a straight line and dashes). A setting around 20V DC is usually fine for truck electrical systems.
- Ground the Black Lead: Connect the black lead of your multimeter to a good ground point (bare metal on the truck frame).
- Probe the Bulb Socket with the Red Lead: Turn your truck’s marker lights ON. Carefully touch the red lead probe to the center contact inside the bulb socket.
- Read the Voltage: Look at the multimeter display.
- Reading of Around 12-14 Volts (or truck’s system voltage): Power is getting to the socket! Again, problem likely at the socket or ground.
- Reading of 0 Volts (or very close to zero): No power reaching the socket. Problem is upstream.
What a “No Power” Reading Indicates:
If your test light stays dark or your multimeter reads 0 volts at the bulb socket, it tells you we need to trace the circuit backwards from the socket. The break in the circuit – the reason for your Volvo VNL marker lights not lighting up – is somewhere before this point. We’ll need to investigate things like:
- Wiring leading to the socket from the fuse box.
- The fuse itself (even if it looked okay visually, it could still be faulty).
- Potentially a relay (if your marker light circuit uses one).
- And, in rarer cases, even the light switch itself.
But before we get too deep into tracing wires, the next crucial step is to check the ground connection for your marker lights. A bad ground can cause all sorts of lighting headaches, even if power is getting to the socket! Let’s tackle that next.
Common Causes of Volvo VNL Marker Lights Not Working
Okay, we’ve gone through the initial checks and even a little bit of electrical testing. But to really nail down why your Volvo VNL marker lights decided to take a break, let’s talk about the usual suspects. Over my years turning wrenches on these big rigs, I’ve seen the same problems pop up again and again when it comes to common Volvo VNL marker light problems. Knowing these common causes can save you time and frustration in your troubleshooting.

4.1 Blown Fuses:
Yep, we touched on this already, but it’s worth repeating: blown fuses are the most frequent cause for marker lights going dark. It’s just the nature of electrical circuits – sometimes things overload, and the fuse does its job and sacrifices itself to protect everything else. Like I said before, it could be a one-off event, an old fuse finally giving up the ghost. But if you keep blowing the Volvo VNL marker lights fuse repeatedly, that’s a strong signal you’ve got a short circuit or another electrical fault somewhere in the system that needs closer attention.
4.2 Burned Out Bulbs:
Another super common one. Light bulbs, even the heavy-duty ones in your VNL, have a lifespan. Vibration from the road, heat cycles – it all wears them out eventually. Sometimes it’s just one bulb gone, sometimes it’s a few around the same time because they were all installed together and have reached the end of their service life. Don’t just assume it’s something complicated when you find Volvo VNL marker lights dead. Always consider the simplest thing first, and that’s often a simple burned out bulb.
4.3 Faulty Relays:
Now, relays aren’t in every single marker light circuit, but on Volvo VNLs, especially on newer models, they are often used. Remember, a relay is like an electrical switch. It can fail just like any other electrical component. Relays can get stuck open (preventing power from flowing), stuck closed (keeping lights on all the time, which isn’t your problem here, but good to know!), or just become intermittent and unreliable. If you suspect a relay, maybe because you hear a clicking sound that’s not right, or you’ve ruled out fuses and bulbs, testing or swapping the relay is a smart next step in diagnosing Volvo VNL running lights malfunction.
4.4 Wiring Issues:
This is a broad category, but wiring problems are a major contributor to lighting failures on trucks. Think about what your truck wiring goes through: constant vibration, flexing, exposure to weather, road grime, and even physical damage. It’s no wonder wiring issues are so common. Here’s a breakdown:
- 4.4.1 Damaged Wiring/Insulation: Wires can get pinched, cut, or have their insulation rubbed away. This can happen from road debris hitting the underside of the truck, wires chafing against frame parts due to vibration, or even from rodents chewing on wiring (yep, it happens!). Damaged insulation can lead to short circuits, causing fuses to blow and lights to fail. Look closely for any obvious signs of damage along the Volvo VNL marker lights wiring.
- 4.4.2 Corroded Connectors: Moisture and road salt are brutal on electrical connectors. Over time, they can corrode, creating resistance and blocking the flow of electricity. This is especially common in areas exposed to the elements. Volvo VNL marker lights wiring problem can often trace back to corroded connectors in the lighting circuit.
- 4.4.3 Loose or Broken Wires: Constant vibration can work wires loose from their connectors, or even cause wires to break internally, especially near connectors or where wires are bent or flexed repeatedly. A Volvo VNL marker lights issue might be as simple as a wire that’s popped out of a connector or broken inside its insulation.
4.5 Grounding Problems:
Grounding is absolutely essential for any electrical circuit to work. Remember that electrical loop we talked about? The ground provides the return path for the electricity back to the battery. If the ground connection is poor – maybe it’s corroded, loose, or broken – it’s like putting a kink in the hose, restricting or stopping the electrical flow. Volvo VNL marker lights ground issue can manifest in different ways – lights might be dim (Volvo VNL marker lights dim), flicker (Volvo VNL marker lights flickering), or just not work at all (marker lights not lighting up Volvo VNL). Always check your ground connections – they are often overlooked but are a frequent source of lighting problems.
Faulty Light Switch/Stalk (Less Common):
While less frequent than bulbs, fuses, or wiring, the light switch on your steering column (or dash) can sometimes be the problem. These switches get used a lot, and over time, they can wear out internally or develop bad contacts. If you’ve checked everything else and still have Volvo VNL clearance lights not working, especially if all your marker lights are out and no fuses are blown, then a faulty light switch becomes a more likely possibility. However, rule out all the more common causes first before suspecting the switch, as switch problems are less frequent than the other issues we’ve discussed.
Okay, with these common causes in mind, you’re now in a much better position to start zeroing in on what’s causing your Volvo VNL marker lights to be dead. In the next section, we’ll get into the actual repair steps, assuming you’ve found the culprit!
Repairing Volvo VNL Marker Lights: Step-by-Step Solutions
Alright, so you’ve done some detective work and hopefully have a good idea of what’s causing your Volvo VNL marker lights issue. Now comes the satisfying part – getting those lights fixed and shining again! Let’s get into the Volvo VNL marker lights DIY repair steps. Remember to always work safely – disconnect your truck’s battery if you’re doing any serious electrical work to prevent shorts and sparks!
5.1 Replacing Bulbs:
If you’ve figured out it’s just a burned-out bulb – awesome! This is the easiest fix for Volvo VNL marker lights not working fix.
- Get the Right Bulb: First, make sure you have the correct replacement bulb. Check your owner’s manual or the bulb itself – it should have a bulb type number printed on it (like 194, 168, etc.). Auto parts stores can also look up the right bulb for your Volvo VNL model. You might even consider upgrading to LED marker lights while you’re at it – they last longer and are brighter, but make sure they are DOT compliant!
- Remove the Old Bulb: Usually, you just need to twist the bulb socket a quarter turn counter-clockwise and gently pull it out of the marker light housing. Then, pull the old bulb straight out of the socket. Sometimes, they can be a little snug.
- Install the New Bulb: Push the new bulb straight into the socket. Handle the new bulb with a clean cloth or gloves to keep oils from your fingers off the glass, which can shorten bulb life.
- Reinstall the Socket: Line up the tabs on the socket with the housing and twist it clockwise to lock it back in place.
- Test It! Turn on your marker lights and make sure that new bulb is shining bright!
5.2 Replacing Fuses:
Found a blown fuse? Replacing it is usually straightforward. Just remember, if it blows again right away, there’s likely a bigger problem.
- Get the Correct Fuse: This is crucial – always replace a blown fuse with one of the exact same amperage. The amperage rating is printed on the fuse itself (e.g., 5A, 10A, 15A). Using a fuse with a higher amperage can overload the circuit and cause serious damage or even a fire – definitely not worth it!
- Remove the Blown Fuse: Fuse boxes often have a little fuse puller tool (usually yellow plastic) inside the lid. Use this to grip and pull the blown fuse straight out. If you don’t have the puller, you can often gently wiggle it out with your fingers or a pair of needle-nose pliers, being careful not to damage anything else in the fuse box.
- Install the New Fuse: Push the new fuse firmly into the empty slot. Make sure it’s seated all the way in.
- Test It! Turn on your marker lights. If they work, and the fuse doesn’t blow again immediately, you might be good to go. But, as I mentioned, keep an eye on it.
5.3 Replacing Relays:
If you suspect a faulty relay, here’s how to tackle a Volvo VNL marker lights relay replacement:
- Locate the Relay: First, you need to find the marker light relay. Your owner’s manual or a Volvo VNL marker lights relay location diagram will be your best friend here. Relay boxes are often near fuse boxes, or sometimes under the hood.
- Identify the Correct Relay Type: Relays are usually plug-in and have a part number printed on the side. Make sure you get a replacement relay that is the exact same type and part number. Using the wrong relay can cause problems.
- Remove the Old Relay: Relays usually just pull straight out of their socket. They can be in there pretty snug, so wiggle it gently as you pull straight up.
- Install the New Relay: Line up the pins of the new relay with the socket and push it firmly into place until it’s fully seated.
- Test It! Turn on your marker lights and see if they’re back in action.
5.4 Wiring Repair:
Wiring problems can be a bit more involved, but often you can fix Volvo VNL marker lights wiring repair issues yourself, especially if it’s a simple damaged wire or corroded connector.
- 5.4.1 Repairing Damaged Wires:
- Identify the Damage: Find the exact spot where the wire is damaged – a cut, chafed insulation, or broken wire.
- Disconnect Power: Crucial! Make sure the power is off to the circuit you’re working on (ideally, disconnect the battery).
- Cut Out the Damaged Section: Use wire cutters to carefully cut out the damaged part of the wire. Give yourself a little extra wire on either side of the damage to work with.
- Strip Wire Ends: Use wire strippers to carefully strip a small amount of insulation off the ends of the wires you just cut. Don’t nick the wire strands themselves.
- Connect with Butt Connectors (Easiest): Butt connectors are simple and effective. Slide a butt connector onto one stripped wire end, crimp it firmly with a crimping tool. Do the same on the other wire end. Make sure the crimp is solid.
- Soldering and Heat Shrink (More Robust, Requires Skill): If you know how to solder, soldering the wires together and then insulating the joint with heat shrink tubing is a more robust repair, especially in harsh truck environments. Solder the stripped wire ends together, then slide heat shrink tubing over the soldered joint and heat it with a heat gun or lighter (carefully!) to shrink it tightly and insulate the repair.
- Insulate the Repair: Whether you use butt connectors or solder, make sure the repaired section is well insulated to prevent shorts and corrosion. If using butt connectors, some come with built-in heat shrink. If not, wrap the connection tightly with good quality electrical tape. For solder joints, heat shrink tubing is essential. [Add Video: Video demonstrating basic wire repair techniques – splicing, connecting, insulating]
- 5.4.2 Cleaning Corroded Connectors:
- Disconnect the Connector: Separate the two halves of the corroded connector.
- Clean the Terminals: Use a small wire brush (like a battery terminal cleaner brush, or even an old toothbrush with stiff bristles) and electrical contact cleaner spray to gently scrub away the corrosion from the metal terminals inside both sides of the connector. Be careful not to damage the pins or sockets.
- Apply Dielectric Grease: Once clean and dry, apply a small amount of dielectric grease (also called tune-up grease) to the terminals before reconnecting. This grease helps prevent future corrosion and improve electrical contact.
- Reconnect Firmly: Push the connector halves back together until they click and are securely connected.
- 5.4.3 Replacing Connectors: If a connector is severely corroded, broken, or the plastic housing is damaged, sometimes the best fix is to replace the entire connector. You can often find replacement connectors at auto parts stores or truck supply places. You’ll need to cut and splice wires, using butt connectors or soldering, similar to repairing damaged wires, but you’re also replacing the whole connector housing.
Ground Connection Repair:
Don’t forget about those grounds! A bad ground can cause all sorts of weird electrical problems, including Volvo VNL marker lights dim or not working at all.
- Locate Ground Points: Ground wires for lights are often attached to the truck frame or chassis near the lights themselves, or sometimes to the cab or body. Look for wires that are bolted or screwed to the metal frame. They are often black wires, but not always!
- Inspect for Corrosion and Looseness: Check the ground connection point for corrosion, rust, or if the connection is loose.
- Clean the Ground Point:
- Disconnect the Ground Wire: Remove the bolt or screw holding the ground wire.
- Clean the Metal: Use a wire brush or sandpaper to clean the metal around the ground point on the frame or chassis until it’s shiny bare metal.
- Clean the Wire Terminal: Clean the terminal on the end of the ground wire with a wire brush or contact cleaner to remove any corrosion.
- Apply Dielectric Grease: Put a little dielectric grease on the cleaned metal surfaces before reassembling.
- Securely Reattach: Reattach the ground wire using the bolt or screw, making sure it’s tight and making good contact with the clean metal surface.
After you’ve completed any of these repairs, always remember to test your Volvo VNL marker lights to make sure they are working correctly before you hit the road. If you’re still having trouble after these steps, or if you’re not comfortable working with electrical systems, it might be time to consider getting some professional help, which we’ll talk about next.
Okay, you’ve gotten down and dirty, tried the troubleshooting, and maybe even gotten your hands greasy with some repairs. That’s awesome! But let’s be real – sometimes, electrical gremlins can be sneaky, or the problem might just be bigger than what you’re comfortable tackling on the side of the road or in your shop. Knowing when to call in the pros for your Volvo VNL lighting system problems is just as important as knowing how to swing a wrench.
When to Seek Professional Help: Knowing Your Limits
Let’s be honest, truck electrical systems can get complex fast. While a lot of marker light issues are indeed simple fixes like bulbs or fuses, there are times when you’re going to save yourself time, money, and a whole lot of headache by calling in a qualified pro. Here’s when I’d recommend seeking professional help for your Volvo VNL electrical system issues, specifically related to marker lights:
- You’re in Over Your Head with Electrical Testing: If you’ve gone through the basic voltage checks and ground checks, and you’re still scratching your head, or if terms like “wiring diagram,” “continuity test,” or “voltage drop test” sound like another language – it’s okay to say, “This is beyond me.” Advanced electrical troubleshooting often requires specialized tools, deeper knowledge of vehicle electrical architecture, and, sometimes, access to those Volvo VNL marker lights wiring diagrams that can be tricky to find and understand if you’re not trained.
- Repeatedly Blown Fuses: If you replace a fuse and it blows again immediately or very soon after, you definitely have a short circuit or overload situation. This isn’t just a simple fix anymore. A short circuit can be tricky to trace down, and if you don’t find and fix the root cause, you could risk damaging more components or even creating a fire hazard. Let a professional diagnose and repair the underlying issue causing the Volvo VNL marker lights circuit problem.
- Wiring Harness Damage is Extensive: If you find major damage to the wiring harness – like multiple wires cut, melted, or heavily corroded over a large area – repairing this correctly and safely can be a big job. Replacing sections of wiring harness, especially in critical lighting circuits, is best left to experienced technicians who know how to do it to factory standards and ensure long-term reliability.
- Intermittent Problems You Can’t Pin Down: Sometimes, you might have Volvo VNL marker lights flickering or working on and off. Intermittent problems are notoriously difficult to diagnose because the fault isn’t always present when you’re testing. A professional shop has the diagnostic equipment and experience to often catch these elusive issues that might drive you crazy trying to find on your own.
- DOT Inspection Issues Looming: Let’s face it, DOT marker light regulations Volvo VNL trucks have to meet are serious. If you’re facing an upcoming DOT inspection and you’re not 100% confident in your repair, or if you’ve tried to fix it yourself and the lights are still acting up, getting it professionally checked and repaired is the smart move to avoid violations and potential fines or being put out of service.
- Simply Don’t Have the Time or Tools: Let’s be real, time is money for truckers. Sometimes, even if you could figure it out, spending hours troubleshooting electrical problems might not be the best use of your time. If you’re on a tight schedule or just don’t have the right tools on hand, taking it to a qualified truck mechanic or a Volvo service center can get you back on the road faster and more reliably.
Maintaining Your Volvo VNL Marker Lights for Longevity
Okay, you’ve hopefully got your marker lights fixed and shining bright again! Now, how do you keep them that way and prevent future headaches? A little bit of preventative maintenance goes a long way in avoiding future Volvo VNL truck lights not working scenarios and keeping you safe and legal on the road.

7.1 Regular Inspections:
This is the simplest and most effective thing you can do. Make Volvo VNL marker light inspection part of your regular pre-trip checks, every time.
- Walk Around Check: Before each trip, do a walk-around of your truck, specifically checking every single marker light – cab lights, side markers, rear markers. Are they all lit when they are supposed to be? Are any dim or flickering (Volvo VNL marker lights flickering or Volvo VNL marker lights dim are early warning signs!). Catching a bulb that’s about to go out early can save you a roadside headache and potential DOT trouble down the line.
- Check After Bumps and Vibrations: After hitting particularly rough roads or experiencing heavy vibration, it’s a good idea to give your lights a quick check again, just to make sure nothing has vibrated loose or been damaged.
7.2 Protecting Wiring:
Protecting your wiring is like preventative medicine for your electrical system.
- Proper Routing and Securing: Make sure wiring harnesses are properly routed away from sharp edges, hot exhaust components, and moving parts. Use zip ties or wiring clips to securely fasten wiring and prevent chafing and vibration damage. If you see wiring hanging loose, secure it!
- Inspect Wiring Regularly: During your routine maintenance, take a few minutes to visually inspect accessible sections of wiring harnesses, especially around marker lights, frame rails, and areas prone to wear and tear. Look for signs of damage – cuts, chafing, cracked insulation. Address any damage you find promptly.
7.3 Using Dielectric Grease:
Dielectric grease is your friend when it comes to preventing corrosion in electrical connectors.
- Apply to Connectors: Whenever you are working with electrical connectors – replacing bulbs, fuses, relays, or repairing wiring – apply a small amount of dielectric grease to the metal terminals before you reconnect them. This grease creates a moisture barrier that helps prevent corrosion and ensures good electrical contact for years to come. It’s cheap insurance against future Volvo VNL marker lights wiring problems caused by corrosion.
7.4 Prompt Bulb Replacement:
Don’t wait until all your marker lights are out to think about bulbs!
- Replace Bulbs as Soon as They Burn Out: As soon as you notice a marker light is out during your pre-trip inspection, replace the bulb immediately. Don’t put it off. A burned-out bulb is not only a safety issue, but it also puts extra strain on the remaining bulbs in the circuit and can sometimes even contribute to other electrical problems down the line. Keeping up with prompt Volvo VNL marker lights bulb replacement is just good preventative maintenance.
By following these simple maintenance tips, you can significantly reduce the chances of future marker lights not lighting up Volvo VNL incidents, keep your truck safe and DOT-compliant, and save yourself from those frustrating roadside lighting headaches. And remember, when in doubt, or if you are facing a complex electrical issue, don’t hesitate to call in the pros!
FAQ – Frequently Asked Questions about Volvo VNL Marker Lights
You know, after doing this for as long as I have, I get asked a lot of the same questions about truck lights. So, I figured it’d be helpful to put together a little FAQ section, answering some of the common questions I hear about Volvo VNL marker lights. Hopefully, this covers some of your quick questions!
Q1: Why are my Volvo VNL marker lights not working but headlights are?
That’s a really common question, and the good news is, it’s often not a huge problem. Most likely, it’s because your headlights and marker lights are on separate circuits and use different fuses. So, if your headlights are working, it just means the fuse for that circuit is fine. You’ll want to specifically check the fuse for your marker lights. Refer back to section 3.1.2 Inspect Fuses to locate your fuse box and identify the marker light fuse. It’s very possible that’s all it is – a simple blown fuse for the marker lights, while your headlight circuit remains unaffected.
Q2: Where is the fuse box for marker lights on a Volvo VNL?
Ah, the age-old question! Truck fuse boxes can be tucked away in a few spots. For your Volvo VNL, the most common locations are: inside the cab (often under the dashboard or in a side panel), and under the hood, near the engine. However, the absolute best place to find the exact location and layout for your specific VNL model is your owner’s manual. That manual will have diagrams showing all the fuse box locations and what each fuse controls. If you don’t have your manual handy, try a quick online search for “Volvo VNL marker lights fuse location” along with your truck’s year, and you might find some helpful diagrams or online manuals.
Q3: Are Volvo VNL marker lights LED or incandescent?
It really depends on the year and model of your Volvo VNL, and even how it was originally optioned. Older VNLs typically used incandescent bulbs for marker lights. Newer models, especially in recent years, often come with LED marker lights from the factory. LEDs are becoming more and more common because they last much longer, are brighter, and draw less power. You can also upgrade your older VNL to LED marker lights yourself – just make sure any LED replacements you use are DOT compliant for legal road use.
Q4: How much does it cost to fix marker lights on a semi-truck?
That’s a “how long is a piece of string?” type of question! The cost to repair Volvo VNL marker lights can really vary widely depending on what the problem is. If it’s just a simple Volvo VNL marker lights bulb replacement, you’re looking at just a few bucks for a new bulb. If it’s a blown fuse, fuses are cheap too. However, if the problem is more complex, like a Volvo VNL marker lights wiring repair issue requiring tracing and fixing damaged wiring, or replacing a whole wiring harness, or if you need a new relay or light switch, the costs can go up considerably, especially if you take it to a shop. Labor costs will be the biggest factor if you go to a mechanic. For a rough ballpark, a simple bulb or fuse fix might be under $20. Wiring repairs could range from $50 to a few hundred dollars depending on the complexity. Replacing a whole harness could be even more. It’s always best to diagnose the issue first to get a better idea of the potential cost.
Q5: Can I drive my Volvo VNL if some marker lights are out?
This is a critical safety and legal question. The short answer is: it’s generally not legal and definitely not safe to drive if your marker lights aren’t working correctly. DOT marker light regulations Volvo VNL and all commercial vehicles must adhere to are very clear about lighting requirements. Marker lights are essential for visibility, especially at night and in poor weather, to show the size and shape of your truck to other drivers and prevent accidents. Driving with non-functioning marker lights can result in DOT violations, fines, and potentially being put out of service until they are fixed. It’s always best to ensure all your marker lights are working before you hit the road. Even one or two being out can be a safety risk and attract unwanted attention from law enforcement.
Q6: What type of bulbs do Volvo VNL marker lights use?
Again, the specific bulb type can vary slightly depending on the exact year and model of your Volvo VNL and the original factory specifications. The best way to know for sure is to check your owner’s manual. It should list the bulb types for all your lights. Alternatively, you can often find the bulb type printed right on the base of the existing bulb itself. Just remove the bulb and take a look. Common marker light bulb types you might see are things like 194, 168, 2825, but always double-check to be certain you get the correct replacement. Using the wrong bulb type could cause issues or not fit properly.
Q7: My Volvo VNL marker lights worked intermittently, now they are completely out. What does this mean?
Intermittent lighting problems that then become permanent are often a sign that something is gradually failing. In the case of marker lights going completely out after working on and off, it strongly suggests a wiring issue, a loose connection, or possibly a relay issue that has gotten worse over time. Maybe a wire was partially broken and finally broke completely. Perhaps a connector that was just barely making contact finally stopped connecting altogether due to corrosion or vibration. Or, a relay that was starting to fail intermittently has now failed completely. This progression from intermittent to completely out really points towards needing to carefully inspect the wiring, connections, and potentially the relay in the marker light circuit, as these are the components most likely to cause this kind of gradual failure.
Hopefully, these FAQs help clear up some of your common questions about troubleshooting Volvo VNL marker lights. If you have more questions, don’t hesitate to ask!
Alright, we’re almost at the end of the road here, but let’s just bring it all home. We’ve covered a lot of ground to get your Volvo VNL marker lights back in business.
Final Knock:
Let’s not forget why we started this journey in the first place: working marker lights aren’t just a nice-to-have, they are absolutely essential. They’re your truck’s way of saying “Hey, I’m here!” to everyone else on the road, especially when visibility gets tough. From a safety standpoint, those Volvo VNL clearance lights not working can be a serious hazard, increasing the risk of accidents, especially at night or in bad weather. And from a legal perspective, running with busted marker lights is a big no-no. You’re putting yourself at risk of DOT violations, fines, and potentially being sidelined when you need to be rolling. Simply put, properly functioning marker lights are non-negotiable for safe and legal trucking.
So, we’ve walked through a step-by-step troubleshooting Volvo VNL marker lights process, starting with the easy peasy stuff – bulbs and fuses – then diving a little deeper into connections, wiring, and relays. You’ve learned how to test for power, check grounds, and even make some basic repairs like Volvo VNL marker lights wiring repair and connector cleaning. Hopefully, with these DIY steps, you’ve been able to pinpoint the issue and get those lights shining again.
But remember, and I can’t stress this enough, safety always comes first. If you ever feel uncomfortable with electrical repairs, or if you’re dealing with a problem that seems more complex than you can handle, don’t hesitate to seek professional help. A qualified truck mechanic or a Volvo service center has the expertise and equipment to tackle even the trickiest Volvo VNL lighting system problems and make sure everything is fixed right, keeping you safe and compliant.
Don’t let those marker light problems keep you in the dark! With a little know-how and a bit of elbow grease, you can usually get them sorted. Keep up with regular Volvo VNL marker light inspection and maintenance, and you’ll be rolling safely and legally, mile after mile. Now get out there and keep on truckin’!