
Is your Volvo S60 fuel gauge not working? This issue can be frustrating.
I’ve owned and worked on plenty of Volvos over the years, and one problem that keeps showing up—especially with older models—is a fuel gauge that stops working. One minute it’s fine, the next it’s stuck on full. Or empty. Either way, it throws off your whole drive. Not knowing how much fuel you have can be stressful. And let’s be real—running out of gas on the road isn’t something anyone wants to deal with.
The fuel gauge might seem like a small part, but it plays a big role. It helps you plan your trips, keeps your engine running smoothly, and protects your fuel system. When it fails, you’re not just guessing your fuel level—you might be risking bigger problems down the road.
If you drive a 2007 to 2018 Volvo S60, or even a V60 or S80 from the same time frame, this guide is for you. I’ll show you the most common reasons why your fuel gauge may be acting up. You’ll learn how to spot the symptoms, what causes them, and how to fix them—whether you want to DIY or go to a shop.
Let’s get into it.
Credit: volvoforums.com
Symptoms of a Faulty Fuel Gauge in Volvo S60
I’ve seen a lot of odd electrical gremlins in Volvos, but when your fuel gauge starts acting up, it’s easy to feel a little lost. One minute you’re driving with a full tank, and the next your dash says you’re about to run out—or worse, nothing changes at all after a refill. If your Volvo S60 fuel gauge isn’t working right, here’s what you might notice.
1. Gauge Stuck on Full or Empty
This is the most common sign. I’ve had a few S60 owners tell me their gauge stayed stuck on full for days. It can also freeze at empty, even right after refueling. If your fuel gauge is stuck on full in a Volvo S60, it might seem harmless at first. But it’s misleading, and you might run out of gas when you least expect it.
2. Flickering or Fluctuating Readings
The gauge might jump around like it’s got a mind of its own. One second it’s at half, the next it’s almost empty. This intermittent fuel gauge issue in a Volvo usually points to a bad sending unit or a loose connection.
3. Fuel Level Doesn’t Match Actual Tank
You fill up the tank, but the needle doesn’t budge. Or you know you’re running low, but it says you’re still good. That mismatch makes it hard to trust the gauge—and that’s never a good feeling.
4. No Movement After Refueling
I’ve seen cases where the fuel gauge just stays put after a fill-up. It doesn’t react at all. This can happen in both analog and digital clusters, and it’s usually a sign the float sensor is stuck or the signal isn’t reaching the dash.
5. Dashboard Warning Lights
Sometimes, your Volvo S60 throws a warning light when the gauge isn’t working. You might see a general warning or a fuel system error. It’s your car’s way of saying something’s not right.
If your fuel gauge shows any of these signs, it’s time to look deeper. Up next, I’ll break down what causes these issues and how to get things working again.
Let’s keep going.
Cause #1: Faulty Fuel Sending Unit
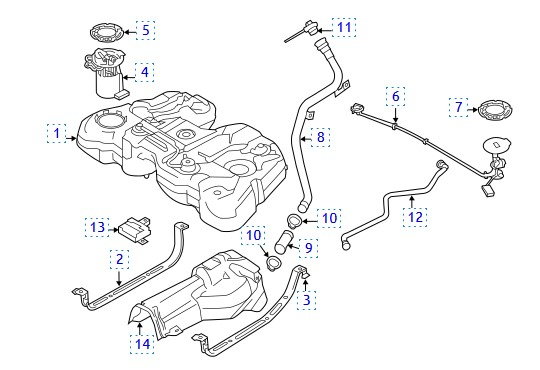
The fuel sending unit is like the messenger between your fuel tank and the gauge on your dashboard. It tells you how much gas is left in the tank. So, if your fuel gauge is stuck on empty or full, chances are the sender has stopped doing its job.
How It Works
Inside the fuel tank, the sending unit floats on top of the fuel. As the fuel level changes, the float moves up or down. That float is connected to a metal arm, and at the end of that arm is a variable resistor. This resistor sends a signal to the gauge telling it what level the fuel is at.
If the float drops, resistance changes. Your gauge reads that and shows “low.” If the float rises, the resistance drops, and the gauge shows “full.” Simple, right?
How It Fails
Things go wrong when the float gets stuck or the resistor wears out. That’s when you start seeing weird stuff—like the gauge stuck at half tank no matter how much gas you pump in.
Sometimes, the metal arm gets bent. Other times, corrosion gets into the contacts inside the tank. On older S60s, I’ve even seen the float soak up fuel over time and sink. That throws off the readings too.
This is one of the most common issues behind a Volvo S60 fuel sending unit failure. If your fuel tank sensor is not working, this is the first place I’d check.
How to Test It
You don’t need fancy tools to start testing. Here’s what I do:
- First, I disconnect the battery. Safety first.
- Then, I remove the rear seat cushion to get to the top of the fuel tank.
- I unplug the connector from the fuel sending unit.
- With a multimeter, I measure the resistance across the sending unit terminals.
- Now I move the float arm up and down by hand.
If the resistance doesn’t change smoothly, the sending unit is shot. Some people skip this and just replace it. But testing first can save money if the problem’s somewhere else.
Fixing or Replacing the Sending Unit
If the unit is bad, you’ll need to replace it. On most Volvo S60s, the sending unit is built into the fuel pump module, so replacing it means dropping the tank or going through the top access panel under the rear seat.
Here’s a quick breakdown:
- Disconnect the battery
- Remove the rear seat cushion
- Unscrew the fuel pump cover
- Unplug the wiring harness and fuel lines
- Pull out the old unit
- Drop in the new one
- Reconnect everything and test it
It sounds harder than it is. The real hassle is dealing with gas fumes and tight spaces. If you’re not comfortable doing this, a shop can usually swap it out in a couple hours.
Cause #2: Blown Fuse or Bad Relay
Sometimes, the fuel gauge stops working because of a simple blown fuse or a bad relay. Yep, it can be that small.
I ran into this with a 2015 Volvo S60 a few years ago. The gauge just dropped to empty one morning—even though I had filled up the day before. I didn’t hear the usual “click” from the fuel pump either. First thing I did? Checked the fuse box.
Where the Fuse Lives
The fuse box location depends on your model year. For most Volvo S60s made from 2011 to 2018, the main fuse box is under the hood—on the driver’s side, near the windshield. Earlier models like 2001 to 2009 usually have one under the dash on the driver’s side and another one in the engine bay.
If you’ve got your owner’s manual, you’ll see a fuse diagram inside. You can also check “Volvo S60 fuse box diagram fuel gauge” online—there are lots of visuals that help.
Common Fuse Numbers for Fuel Gauges
These are some fuse numbers I’ve seen tied to fuel gauge and instrument cluster:
| Year Range | Fuse Box Location | Likely Fuse Number | What It Controls |
|---|---|---|---|
| 2001–2009 | Driver Dash | #8, #15, #23 | Cluster, Fuel Pump |
| 2011–2018 | Engine Bay | #15, #20, #23 | Cluster, Fuel System |
| 2019–2021 | Rear Cargo Area | #30, #31, #34 | Gauge & Data Bus |
How to Check and Replace It
I always start by pulling the suspected fuse with a fuse puller or needle-nose pliers. Hold it up to the light. If the metal strip inside is broken or burnt, it’s toast.
Swapping in a new one takes seconds. Just match the same amp rating—usually 10A or 15A for fuel-related systems.
Relays are trickier. You may hear a click from the relay when you turn the key. No click? Swap it with a similar relay from the fuse box. It’s a good trick I use to test without tools.
If the new fuse or relay fixes it, you’re golden. If it blows again soon, something else is causing a short. That’s when it’s time to chase wires or check the fuel pump.
Cause #3: Bad Instrument Cluster Stepper Motor Failure
Older S60s—especially 2007 to 2012—had a common problem with the stepper motors inside the instrument cluster. These are tiny motors that move the gauge needles.
In my 2008 S60, the fuel gauge needle used to get stuck at half-full. Some days it moved, some days it didn’t. Classic sign of a failing stepper motor.
Stepper Motor Symptoms
Here’s what I’ve seen in bad stepper motor cases:
- Gauge needle stuck or jumps randomly
- Needle moves slow or twitches
- Fuel level doesn’t match reality
- Other gauges (like speedometer) act weird too
These motors wear out over time. Heat, age, and cold solder joints make things worse.
Do You Need a Full Cluster Replacement?
If just one gauge acts up, you might get away with replacing a single stepper motor. But here’s the catch—most people don’t have the tools to open and solder the cluster.
If more than one gauge is acting weird? Or if the backlighting’s flickering? You’re probably looking at a full cluster replacement.
I once had a customer with a 2010 model pay for a rebuilt cluster swap. It was the easiest fix—plug and play. Took under 30 minutes.
Cost Estimate
Here’s a quick breakdown:
| Fix Type | Cost Range |
|---|---|
| DIY stepper motor fix | $20–$50 (parts only) |
| Rebuilt cluster swap | $300–$600 |
| Brand-new cluster (dealer) | $800–$1,200 |
Rebuilt clusters are a good option if you’re on a budget. Just make sure the mileage is programmed to match your car—or the DMV might not be happy.
Cause #3: Bad Instrument Cluster or Stepper Motor Failure
If your Volvo S60’s fuel gauge has been acting like it’s got a mind of its own, the issue might be hiding in the instrument cluster. I’ve seen this more than once, especially on older models—mainly between 2007 and 2012. That cluster can be sneaky.
Inside that dash display sits a tiny part called a stepper motor. It’s the little guy responsible for moving the fuel needle. And when it starts going bad, your gauge can start jumping around or get stuck completely. Sometimes it shows empty even after a full tank, or it’ll dance back and forth like it’s had one too many cups of coffee.
I had this exact problem with a 2009 S60 I worked on. At first, I thought it was the fuel sending unit. But nope—the signal was fine. It turned out to be a faulty stepper motor in the cluster.
Here’s what to look for:
- The fuel gauge needle sticks or jumps randomly
- Other gauges (like temp or RPM) also act weird
- Backlighting or display glitches on the dash
- The gauge shows empty even when you’ve just filled up
Do You Need a Full Cluster Replacement?
Not always. If it’s just one stepper motor, some shops or repair techs can replace that part by itself. It’s delicate work and usually involves soldering, so it’s not a typical weekend DIY job unless you’ve done circuit repairs before.
But if multiple gauges are failing—or the circuit board is fried—it’s safer to replace the whole instrument cluster. Just know that it’ll need to be programmed to your Volvo’s system, which often means a trip to the dealership or a Volvo specialist with VIDA software.
What’s the Cost?
Replacing a full instrument cluster on a Volvo S60 isn’t cheap. Depending on where you go, it can run between $500 and $1,200, including parts and labor. If you’re lucky and only need a stepper motor swap, the repair could be as low as $100 to $300. But again, that depends on who’s doing the work.
Quick Tip:
Search for Volvo S60 instrument cluster issues or stepper motor fuel gauge Volvo in forums. I’ve found some solid advice from other owners who’ve tackled this themselves or found trusted shops that do these repairs at a fair price.
Here’s the next section, written to flow naturally from the previous part, keeping the same friendly, experienced tone and high readability:
Cause #4: Fuel Level Sensor Malfunction
On newer Volvo S60s—especially models from 2013 to 2018—the issue often points to the fuel level sensor. Not the sending unit itself, but the actual sensor that reads the position of the float and sends that signal to the gauge.
It’s a small difference, but a big deal.
I’ve had a few S60s come through the garage where the gauge acted flaky, but the sending unit looked fine. That’s where the fuel level sensor came in. It’s part of the assembly inside the tank, and it’s a known trouble spot on mid-2010s Volvos.
How’s It Different from a Sending Unit?
People mix them up a lot. The sending unit is the whole setup that sits in your gas tank. It holds the pump, float, and sometimes the sensor. The fuel level sensor is just the part that actually reads the float’s position and sends a signal to your instrument cluster. Think of it as the translator between your gas tank and the dash.
If your gauge shows empty or jumps around but your car still runs fine and you don’t smell fuel leaks, there’s a good chance the sensor’s the problem.
How to Test the Sensor with a Multimeter
If you’ve got some basic tools and a bit of patience, you can test the fuel level sensor at home. Here’s how I do it:
- Disconnect the battery first—safety first, always.
- Access the fuel pump area. On most S60s, it’s under the rear seat or trunk liner.
- Unplug the wiring connector from the fuel pump/sending unit.
- Set your multimeter to ohms (Ω) and check resistance across the sensor terminals.
Move the float manually if possible. The resistance should change smoothly. If the reading jumps, sticks, or doesn’t change at all, the sensor’s likely bad.
Replacing the Sensor
The fuel level sensor is usually part of the pump assembly, which means you’ll need to drop the fuel tank or at least lift the pump out to swap it. Some techs replace just the sensor if they can find a direct-fit part. But on most Volvos, it’s safer and easier to swap the whole assembly.
Labor can be a bit of a chore since you’ll be working in tight spaces. I always plan at least a couple of hours for this job. It’s not the worst DIY job, but it does take time and care.
Heads-up: Always work in a well-ventilated space and keep a fire extinguisher nearby. Gas fumes are no joke.
A Quick Reminder
Search for Volvo fuel level sensor malfunction or how to test Volvo fuel gauge and you’ll find lots of fellow owners sharing their fix-it stories. Some even found great walk-through videos that helped a ton.
Cause #5: Wiring Harness or Grounding Issues
Here’s a part most people skip—and I get it. Wires aren’t flashy. But I’ve seen more fuel gauge issues caused by a bad ground or a frayed wire than by the gauge itself.
Especially on older Volvos or ones that have seen salty winters.
What to Look For
Start with a simple visual check. You want to spot:
- Cracked insulation
- Burnt or melted connectors
- Greenish corrosion on terminals
- Loose or jiggly plugs
I once had a 2015 S60 in the shop with a fuel gauge that danced around like a loose cable box antenna. After pulling the rear seat, I found one ground wire barely hanging on. One quick re-solder and the issue was gone.
Where to Inspect
Most of the fuel system wiring lives near the fuel pump, which you’ll usually find under the rear seat cushion or trunk floor, depending on your trim.
Here are the hot spots I always check:
- Around the fuel pump connector
- Along the body harness that snakes along the floor
- Ground strap near the rear seatbelt bolts or undercarriage
Those areas see a lot of moisture and road grime. It’s common for Volvo S60 wiring harness problems to hide out there.
How to Fix It Right
Got a broken wire or nasty corrosion? Don’t just twist the ends together with tape.
Here’s my go-to fix:
- Cut out the damaged section.
- Strip the ends clean.
- Slide on heat-shrink tubing (before soldering—you’ll thank yourself later).
- Solder the wires together tight.
- Slide the tubing over and heat it until it seals.
If you’re not a fan of soldering, crimp connectors work too. Just make sure they’re weatherproof. You don’t want water creeping back in.
Final Thought on Wiring Issues
Wiring faults are sneaky. They can cause an intermittent fuel gauge on a Volvo that’s hard to pin down. But once you track it to a bad wire or ground, the fix is usually cheap and quick.
This is one of those fixes that feels great when it works—because you solved it with eyes and hands, not a parts cannon.
Cause #6: CEM or REM Module Failure (Advanced)
This one’s a bit more advanced, but I’ve seen it catch even seasoned techs off guard. If your fuel gauge isn’t acting right and you’ve already ruled out the obvious stuff, it might be a module issue—specifically the CEM or REM.
What Are These Modules?
Volvo loves acronyms. The CEM is the Central Electronic Module. It’s the brain that talks to nearly everything in the car. The REM is the Rear Electronic Module. It handles stuff in the back, like lights, fuel pump, and yes—fuel level data.
These two modules talk to each other. If one of them goes haywire, your gauge might stop reading, jump around, or even stay stuck—despite the fuel sensor working just fine.
Error Codes to Watch For
I always start with a scan. If I spot codes like:
- CEM-4A31
- REM-4A10
- CEM-4A02
That’s usually a sign the module is losing communication or misreading the fuel signal.
These aren’t generic codes. They’re Volvo-specific, so a basic OBD2 reader won’t catch them. I use VIDA (Volvo’s own diagnostic software), but there are solid pro-level scan tools like Autel or Launch that can read these modules too.
When Modules Go Wrong
A bad REM can throw out false fuel readings, especially if there’s a voltage drop or water damage. I once had an S60 where the REM looked totally fine—until I pulled it and found rust on the backside.
Some CEM module failure symptoms look random. Fuel gauge goes dead. Then comes back. Then dies again. No rhyme or reason. That’s your hint something deeper is off.
Should You Try to Fix This Yourself?
This is where I usually tell DIYers to pause. If you’re getting weird REM-4Axx error code messages and you’ve never pulled a module before, it’s easy to fry it by accident. And trust me—used CEMs aren’t cheap, and new ones require programming.
If the scan confirms a problem with the CEM or REM, I’d recommend seeing a Volvo tech or shop with VIDA access. They can run full diagnostics and reflash or replace the module the right way.
Model-Year Breakdown: Common Fuel Gauge Problems by Year
Some Volvos seem to have more fuel gauge issues than others. I’ve worked on a bunch of S60s over the years, and patterns have popped up. So I thought it’d help to break it down by model year.
2007 Volvo S60
This one’s old-school Volvo. Still has some quirks, though. Most fuel gauge problems I’ve seen in this year come from the fuel level sensor itself. Either the float arm sticks or the contacts inside get dirty. Sometimes, the sensor reads full no matter what’s in the tank.
Other times, it’s just a blown fuse or a corroded wire near the fuel pump. Simple stuff, but it’ll still leave you guessing if you’re low on gas.
2012–2013 Volvo S60
These model years got hit with a mix of wiring issues and software bugs. I once had a 2013 come in with a fuel gauge stuck at zero. The fix? A software update from Volvo. Seriously. No bad parts. Just glitchy programming.
Also saw a few with failing REM modules. Those would throw up REM-4Axx codes and need reprogramming or replacement.
2016–2018 Volvo S60
More electronics. More chances for weird problems. In these years, I’ve run into a lot of intermittent readings—gauge works fine one day, goes blank the next.
The common thread? Loose connections in the rear wiring harness. I’ve also seen a few bad sending units, which is what tells the gauge how full the tank is.
The 2018 Volvo S60 fuel gauge not working issue often leads back to either a faulty REM or corrosion near the connector pins at the fuel pump. Both are a pain to spot without a scan tool.
Volvo V60 and S80: Quick Comparison
Both of these share a lot of DNA with the S60. So the problems carry over.
- Volvo V60 fuel gauge problems usually come from the same REM or fuel level sensor faults. I’ve also seen water damage under the rear seats cause all sorts of electrical weirdness.
- Volvo S80 fuel gauge not working? Nine times out of ten, it’s a bad fuel pump assembly. Either the sensor’s off, or the wiring gets brittle and cracks over time.

Credit: www.youtube.com
How to Fix It Yourself vs. When to See a Mechanic
I know the feeling. That fuel gauge drops to empty out of nowhere, and you’re thinking, “Do I really need a mechanic for this?” Not always. Some of the fixes are pretty easy—even for beginners. Others? Better left to a shop with the right tools.
What You Can Fix Yourself
If you’re handy with a socket set and not afraid to pop a few panels, you might be able to tackle these on your own:
Check the Fuse
This is the easiest thing to start with. On most Volvos, the fuse for the fuel gauge lives in the REM (Rear Electronic Module) or under the dash.
- What to do: Pull the fuse, check for breaks, and swap it with a new one if it looks burnt.
- Time: 5 minutes
- Cost: Under $5
Inspect the Wiring
Sometimes it’s just a loose wire or a crusty connection causing the problem. This happens a lot under the back seat near the fuel pump.
- What to do: Wiggle the wires a bit. If the gauge jumps back to life, you’ve found the issue. Clean and tighten the connection.
- Time: 15–30 minutes
- Cost: Free if it’s just cleaning, maybe $10 for contact cleaner.
Test the Fuel Level Sensor
This one’s a little deeper but still doable. You’ll need a multimeter and some patience.
- What to do: Remove the back seat, pull the fuel pump cover, and unplug the sensor. Test for resistance. A stuck float or open circuit means the sensor’s bad.
- Time: 1–2 hours
- Cost: Replacement sensors run $40–$100, depending on the model.
When It’s Time to Call a Mechanic
Some problems are just too tricky to mess with at home—either because they need dealer-level tools or involve the car’s brain.
Here’s when I say don’t DIY it:
- Software glitches: If the gauge works one day and goes blank the next, you might need a software update or reflash.
- REM issues: Replacing or reprogramming the Rear Electronic Module isn’t a job for beginners.
- Fuel pump replacement: The part’s easy enough, but removing the pump without damaging the lines or tank takes skill.
What It Might Cost at a Shop
Let’s break down what you might pay if you roll it into a mechanic’s bay:
| Repair Type | Parts Cost | Labor Time | Estimated Cost |
|---|---|---|---|
| Fuse replacement | $5 | 0.2 hrs | $20–$50 |
| Wiring repair | $10–$30 | 0.5–1 hr | $80–$150 |
| Fuel level sensor | $50–$100 | 1.5–2 hrs | $250–$400 |
| REM reprogramming | $0 (if reused) | 1–2 hrs | $200–$350 |
| Fuel pump replacement | $200–$500 | 2–3 hrs | $400–$800+ |
I always tell people—if it’s a fuse or a wire, go for it. But once software or fuel modules get involved, it’s safer to let a pro take the wheel.
Preventive Tips to Avoid Fuel Gauge Problems
I’ve learned the hard way that fuel gauge issues can sneak up when you least expect them. Fixing them is one thing—but avoiding them? Way easier. Here’s what I always stick to now to keep my Volvo’s gauge reading right.
Use High-Quality Fuel Every Time
I used to grab whatever gas was cheapest. Big mistake. Low-grade fuel can leave behind buildup in the tank. That gunk can mess with the fuel sending unit, which feeds data to your gauge. Over time, that dirt can lead to misreadings or a gauge stuck on empty.
Since switching to Top Tier fuel, I haven’t had a single problem. It costs a bit more, but it saves me from the hassle—and cost—of repairs.
Don’t Let Your Tank Run Low
I know how tempting it is to stretch one more trip out of a near-empty tank. I’ve done it too. But doing that too often can wear out your fuel pump and mess with the fuel level sensor. These sensors sit inside the tank. If there’s not enough fuel to keep them submerged, they dry out and go bad faster.
Once I made it a rule to refill at a quarter tank, my fuel gauge stayed happy. And so did my wallet.
Check the Electrical Connections Now and Then
Wires don’t last forever. Heat, moisture, and vibration from everyday driving can loosen connections or cause corrosion. That’s why I started checking my wiring every few oil changes. It’s quick. Just a peek at the wiring around the fuel pump harness and fuse box can spot an issue before it kills the gauge.
And if you’re already chasing a weird gauge reading, this is where I’d start. Most “Volvo fuel gauge troubleshooting” cases I’ve run into were wiring-related.
Update the ECU on 2017–2018 S60s
This one’s a known issue. Some of the 2017 and 2018 Volvo S60 models have a software bug that causes weird fuel gauge behavior. Mine used to drop from half to empty in minutes. Thought it was a bad sender. Turned out, it was just outdated software in the car’s ECU.
A trip to the dealer fixed it fast. They updated the system, and I haven’t seen a false reading since.
If you’ve got one of those model years and your gauge is acting weird, this should be the first thing on your list. It’s not a hardware problem—it’s a digital one. Fix the software, and the gauge resets itself.
FAQs: Volvo S60 Fuel Gauge Not Working
Is this a recall issue?
I get this question a lot. And I get it—recalls mean free repairs. While some S60s (especially 2017 and 2018 models) had known software bugs that caused fuel gauge problems, they weren’t always classified as full recalls. Volvo issued technical service bulletins (TSBs) instead. That means the fix is known, but it’s not free unless your car is under warranty.
It’s worth calling your local dealer with your VIN to check. I’ve seen cases where folks got it covered even outside the usual window.
Can you drive safely without a working fuel gauge?
Technically, yes. But I wouldn’t recommend it. Not knowing your fuel level turns every drive into a guessing game. I once ran out of gas on the highway—thought I had more in the tank. That was a lesson I didn’t want to repeat. If your gauge is acting up, use your trip meter to track miles until you get it fixed.
How much does it cost to fix?
That depends on what’s causing the issue. A bad fuel sending unit might run between $300–$600 with labor. Electrical problems or wiring issues could be cheaper—sometimes just a $50 connector or fuse. If it’s software, a dealer update might cost around $150 unless it’s covered under warranty or a TSB.
Before spending a dime, get a full diagnostic. I always say—don’t throw parts at a problem until you’re sure of the cause.
Can a software update fix fuel gauge issues?
Yes, it can. Especially if you drive a 2017 or 2018 Volvo S60. There’s a known glitch in the ECU software that causes inaccurate readings. A quick update from the dealer can fix it without replacing any parts. Mine needed this exact update, and it solved the problem overnight. Totally worth checking before tearing into the fuel tank.
Final Words
So here’s the bottom line:
Your Volvo S60’s fuel gauge can stop working for a bunch of reasons. Could be the fuel sending unit. Maybe a wiring fault. Sometimes it’s just a software bug, especially in newer models. I’ve even seen bad clusters or loose grounds mess things up.
Catch problems early, and you’ll save time and money. Keep your tank from running too low, check wires now and then, and don’t skip updates. Simple stuff, but it goes a long way.
Got questions? Drop them in the comments. I’ll answer as best I can. And if this guide helped, feel free to share it with another Volvo owner—it might save their day too.
Author
Author

Evans Torres
I’m Evans Torres, an automotive engineer who loves Volvo cars. I graduated in Automotive Engineering from USC. I have worked in the car industry for years and now share my knowledge on The Volvo Life. I started this blog to connect with other Volvo fans. I offer tips, news, and advice to help you care for your car. My goal is to help you keep your Volvo in great shape and find all the best things about it. Join me as we discover everything Volvo has to offer!
💡 Evans Torres Tip: On every Volvo I have owned, I always keep a full digital service record from day one. When something goes wrong — and eventually something always does — having that history makes diagnosis faster and often saves money at the mechanic. Start your records today, even if the car is not new.